
Adobe Photoshop: How to Make Cut up Text - Acuity Training
Adobe Photoshop: How to Make Cut up Text
Cut Up Text
In this Photoshop tutorial we’re going to give you a taste of the type of skill that you woudl pick up on our Photoshop course be slicing and dicing some text. It’s a technique that’s useful for shattering and breaking up almost any item in Photoshop. The tutorial also introduces some useful strategies for applying textures and effects to multiple Layers simultaneously for time saving effect generation, this works well with the double exposure tutorial shared here.
If you are interested in learning more about Photoshop please see our main Adobe Photoshop page.
Background Graph Paper image included, no rights restriction for personal use, copyright owned by the creator Simo Bogdanovic 2014
Step 1
Use Cmd/cntl +O to open the graph paper image background.
S/shot 01.jpg
Select the Horizontal Text Tool (T) and click on the document to create a Type Layer. Enter you chosen text and then use the Options bar to specify the text attributes. In our example, we’ve used the font Akzidenz-Grotesk BQ Bold Italic at 1000 px size. Click the Font Colour box and set the colour to R128 G128 B128. Once you’ve finished, use the shortcut Cmd / Cntl + Enter to commit the Type Layer.
S/shot 02.jpg
Step 2
In this step we’ll begin to slice and cut up the text we’ve just created. So that we can easily manage the Layer styles that we’ll be adding, it’s useful to have the Layers nested inside of folders. With the Text Layer selected, use the shortcut Cmd/Cntl +G to create a Layer Group. In the Window menu > Layers Panel, change the Group name to ‘Text’.
Select the Text Layer in the Panel list. Go to the Type menu > Rasterize Type Layer command to convert the Layer to pixels for editing:
S/shot 03.jpg
Select the Polygon Lasso tool (L). In the document, make a selection over one part of a letter. Use the shortcut Cmd / Cntl + Shift +J to cut the selected area to a new Layer. Use the Move tool (V) to offset the position of the cut copy a little:
S/shot 04.jpg
Select the original Text Layer in the Layers Panel. Use the Lasso tool to select another section of the text and use Cmd/Cntl + Shift + J to cut that piece to a new Layer. Use the Edit > Transform > Rotate command to angle each piece a little differently from the original text. Continue with the same steps, working across all the text characters, but aim to leave some of the text behind on the original text Layer at the end:
S/shot 05.jpg, 06.jpg
In the Window menu > Layers Panel, select the Layers which you’ve created by slicing up the text, but not the remnants of the original text. Use the shortcut Cmd / Cntl + G to create a group containing these Layers. Call the Group ‘Pieces’:
S/shot 07.jpg
Step 3
We’ll now add some texture to the text using some Pattern Fills. Having the Layers stored inside a group makes this process much easier, as we can apply these treatments directly to the parent Group, and affect all the nested Layers at once.
In the Window menu > Layers Panel, select the Text Group. Make sure the folder is not expanded in the Panel list. Use the shortcut to Cmd / Cntl + Shift + N to create a New Layer above the Group. In the dialog box, name it ‘ Wood Fibres’. Check to tick box to ‘Use Previous Layer as Clipping Mask’. Set the Blend Mode to Normal. Click OK:
S/shot 08.jpg, 09.jpg
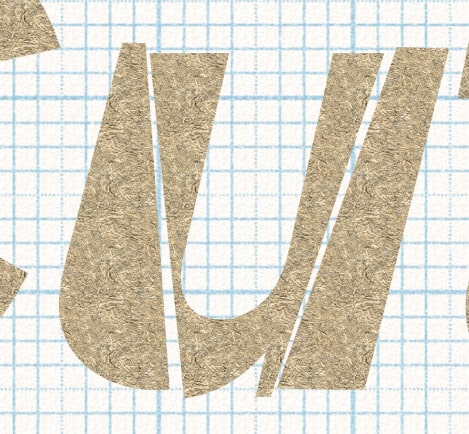
Use the shortcut Shift key + Backspace to display the Edit menu > Fill command. In the Fill dialog box, click the Use menu and select Pattern. From the Pattern Library, click on the side menu and load the Greyscale Paper Pattern Pre-sets. Select the fibres 2 Pattern. Click OK to apply the Fill:
S/shot 010.jpg, 011.jpg
Use the shortcut to Cmd / Cntl + Shift + N to create another New Layer above the Group. In the dialog box, name it ‘ Parchment’. Check to tick box to ‘Use Previous Layer as Clipping Mask’. Set the Blend Mode to Overlay. Click OK:
S/shot 014.jpg, 015.jpg
Use the shortcut Shift key + Backspace to display the Edit menu > Fill command again. From the Pattern Library, click on the side menu and load the Artists Surfaces Pattern Pre-sets. Select the Gold Parchment Pattern. Click OK to apply the Fill.
S/shot 012.jpg, 013.jpg
Step 4
The texture is looking a little flat, so we’ll increase the contrast on the fibres Layer. Select the fibres Layer in the Panel List and go to the Image menu > Adjustments > Curves command ( Cmd/Cntl +M). Click to add two points on the graph line and move them to produce a subtle ‘S’ shaped contrast curve then click OK:
S/shots 017.jpg, 018.jpg
The colour of the parchment Layer looks a little pale, so we’ll add some saturation. Select the Parchment Layer in the Layers Panel. Go to the Image menu > Adjustments. Hue +Saturation command ( Cmd/Cntl +U). Increase the Saturation slider to +25. Click OK:
Step 5
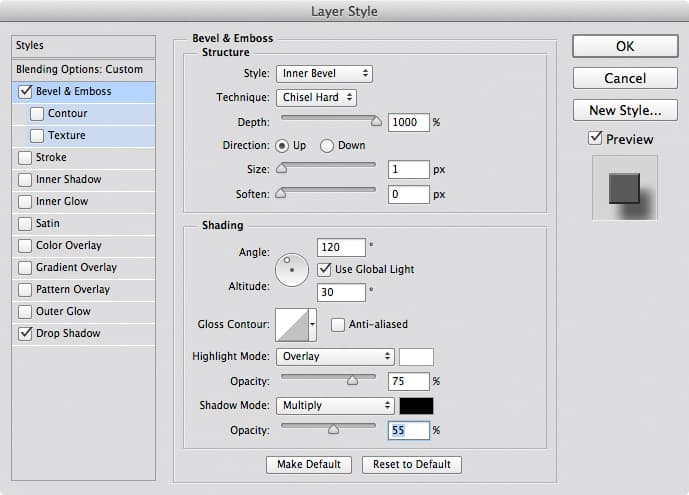
We’ll now add some depth to the wood cuts by applying some Layer Styles. In the Window > Layers Panel, select the Text Group. Go to the FX menu at the bottom of the Panel, and apply the following styles:
Bevel and Emboss
Type: Inner Bevel
Technique: Chisel Hard
Depth: 1000 %
Size: 1px
Soften: 0%
Angle: 120 degrees
Altitude: 30 degrees
Highlight Mode: Overlay, Opacity 75 %
Shadow Mode: Multiply, Opacity 55%
Drop Shadow
Blend Mode: Multiply
Opacity: 59%
Distance: 21 px
Spread: 0%
Size: 21 px
S/shot 020.jpg
Shot 021.jpg
Step 6
As a finishing touch, we’ll add a little more shadow to the pieces we’ve lifted. In the Layers Panel, select the Pieces Layer Group. Use the FX menu to add a Drop Shadow Effect with the following settings:
Opacity: 80%
Distance: 21 px
Spread: 0%
Size: 55 px
S/shots 022.jpg, 023.jpg,024.jpg
The effect works well where the shadow falls on the base text Layer, but appears too strong where it falls on the graph paper background. We’ll fix this using the following steps:
Obviously this is an effect that people most associate with Illustrator rather than Photoshop. It shows the power that Photoshop now has. If you want to work with vector files Illustrator is still the best choice but if you are working with pixel-based files then Photoshop is often quicker and simpler for creating illustrations. Our Photoshop CC training covers creative painting techniques as well as more traditional photo retouching methods.
With the pieces Group selected, go to the Layer menu > Layer Style menu > Create Layer command. This will generate an artwork Layer from the Drop Shadow Effect in the Layers Panel


